Followers

Showing posts with label Book. Show all posts

Thursday, 22 July 2021

Patchwork journal cover

 Hello again!  

This months River of Creativity challenge is basically nothing soppy :-).  I had to have a think about this one, not that my makes are that soppy, but I wanted to do something other than a card etc.

I have done some hand sewn patchwork to use up some scraps of fabric and made an A5 JOURNAL COVER.


Apart from the patchwork I have left it plain with no adornments so that there is no worry about it lying flat.  Here is how the book inside fits....


And here is the outside all opened up flat...


Thank you for popping by, take care and be safe, hugs x


Tuesday, 18 February 2020

Large Ring Binder

Hello! Here is the largest *RING BINDER* in the set of three from Tando Creative.  This one is around 9x11 inches, just under A4.  As a set they are incredibly good value!!!!
 
 
In a bid to use up my papers I have covered all the outsides apart from the spines.  The inside is just painted *CADMIUM RED* as well as the edges and spines on the outside.  The large *DISTRESSED HEART*  has been distressed some more around the edges and had some of the *TEXTURE THINS* added before painting in the same red.  A strip of wide lace was glued around the outside as shown before the heart was attached.
 
Thank you for taking a look, take care xxx

Wednesday, 29 January 2020

Mini Ring Binder

Hi everyone!  Here with a layered up *LITTLE RING BINDER* for you.  This is one of the smaller ones that comes in a pack of 3 for you to decorate.
 
 
To start I glued on a grid to the front and then painted both sides with a pale lilac.  Watering down some blue and purple acrylic I applied it wet and let it run where it wanted.  I also lightly brushed the inside with it.
 
 
Taking some leaves from the *MINI LEAVES* pack I painted these green and a little bird was painted off white.  These were added as shown.  I spruced up the spine with some fancy flowery trim, ribbon and beads.  I also added some trim to the leaves to add more texture. The folder stays closed with ribbon.
 
Thank you for taking a look, hugs, Karen x 

Tuesday, 7 January 2020

Art Journal

Helloooooo!!!  Over at *TANDO CREATIVE* this months colour theme is lovely!!!  Though I did use the colours they seem to have come out a lot brighter in the photo's.....never mind!!!


I have made up and decorated the *ART JOURNAL STARTER KIT*  .  This is a lovely A5 book with sewn in signatures and comes with everything that you need including the needle and thread!!!!!.  The paper for the pages is wonderful quality and could stand anything you throw at it. Its very easy to put together with full instructions.
 
The front.... I added some texture paste and lace to the front before painting it.  The spine wraps around and that was painted then had *WEATHERED WOOD* added before painting again.  The * MINI BIRDS* were painted and added on at the end.
 

The back...
 
A look at the spine...
 
 Such a worthwhile project to do!!!!

Thank you for looking today xxx

Monday, 26 August 2019

Mini Books revisited!

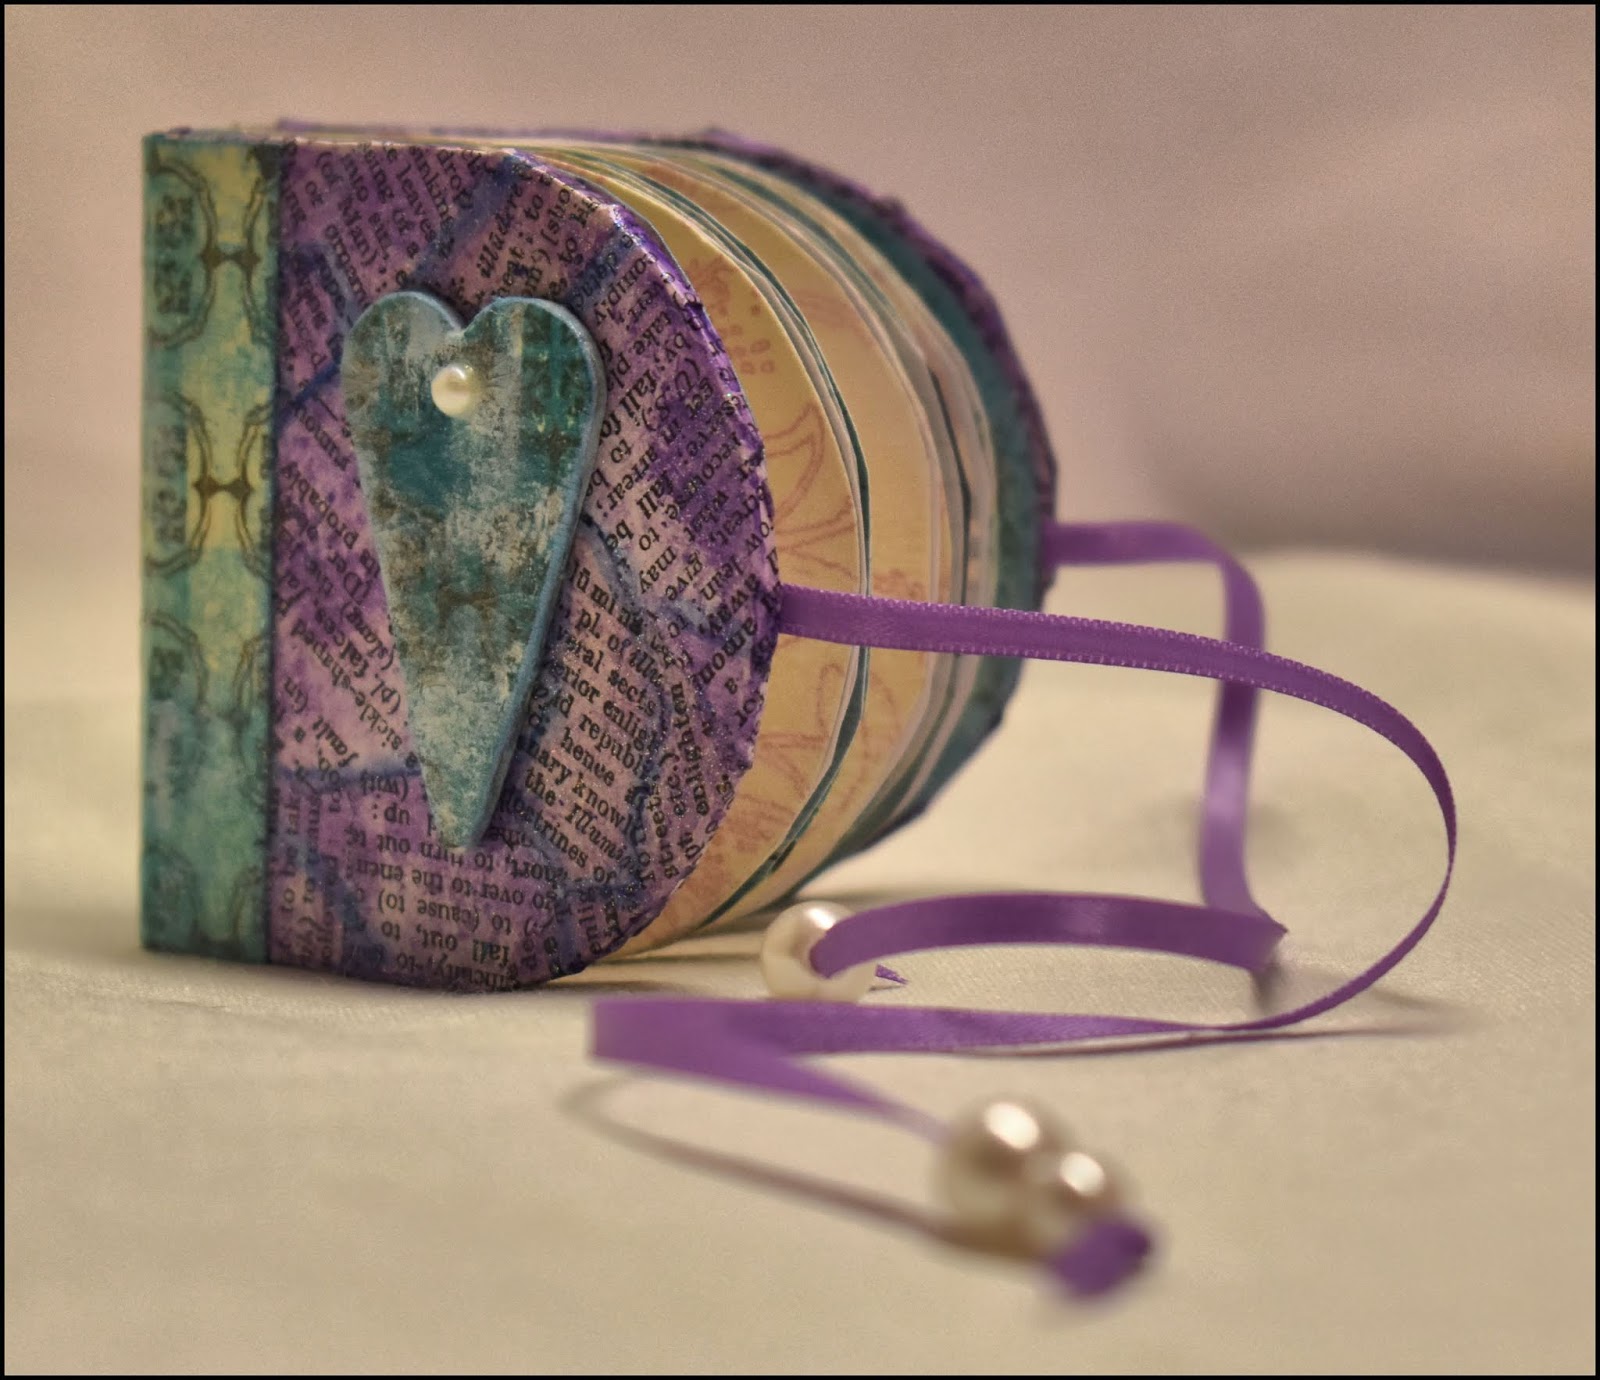
 Hi, today I am showing you some little books that I made for a show last year when all the gorgeous MINI BOOKS were launched by Tando Creative.  I don't think these have been blogged before which was very remiss of me.
 
 
So here we have 2 of the rounded end ones and 1 wrap round.
 
 
Although the curved end looks like it make it difficult to make the pages all you need to do is to draw around the cover.  Both this one and the Christmasy one have patterned paper pages with a light layer of tinting base.
 
 
This one I turned into a Post-It Note holder...just the right size!!!!! It would have had a pen or pencil included but I couldn't find one small enough in the time I had.
 
 
I hope you enjoyed this little look back, come again soon,xxx


Monday, 8 October 2018

Featured in Craft Stamper - Post-It Note Holder

Hello everyone!  The Tando team are delighted that we are featured in November's issue of THE CRAFT STAMPER!  We were all sent the same substrate to work with so it will be very interesting to see how different they all are!  To be honest it doesn't have a name (as yet) but it is a fun piece!!!! 

I am kicking off with mine and I have turned it into a Post-It note holder, although they are diddy!
 
 
Lots of Weathered Wood Crackle going on! And open....
 
 
The two little Post-It note holders...
 
 
Thank you for looking . 

Take care , Karen xxx

Tuesday, 17 April 2018

Mini Library!

Hello!!!!!!  For this 'Anything Goes' week I am showing you all the mini books from the *Mini Books Mega Pack* that I have made up (except the tall ones which are in another post).  I have also made up the very cute *Mini Book Store* to put them in!  I have kept the book store fairly plain as, for me, the mini books are the stars.
 
 
I used different way to decorate the books, just to show you what can be done on something so small!  On the bottom shelf are the larger ones (8x8cm) which have a cleverly designed bendy spine so it comes all in one piece.  I made three of these....
 
Using a stencil and modelling paste...
 
 
Paint and a bit of crackle....
 
 
Modelling paste again and a bit of crackle....
 
 
The smaller 6x6cm books come in 3 pieces so you need to add a piece around the spine to hold it together.  I have used fabric and lace for these.
 
This one has been run through an embossing folder...
 
 
I only used fabrics for this one...


Modelling paste through a stencil with a stamped and cut out butterfly...
 
 
This last one was covered with patterned paper and lace and has a wrap round string tie.  Not too sure about this one at all.


I have so many ideas and not enough books in the pack :-D  I must get some more!!!!!
 
No matter which way you decorate these little books have fun and do get the bookcase for them as they all look fabulous in there!!!
 
Take care, Karen xxx

Thursday, 8 December 2016

collage or mixed-media?

Its collage week over at The Craft Barn Blog.  This begs the question of how does collage and mixed-media differ?  Or do they?  Is mixed-media just a new term for collage???  From my understanding mixed-media is about paint and texture while collage is the rest haha!  I am probably wrong and I am sure someone will correct me please!

Anyway, enough waffle...here is a little A6 book that I have altered in what I think of as collage style...


I carefully took the covers off the rings and 'collaged' them with old printed paper.  I have an old dictionary and ready reckoner that I use for these things.


I also 'collaged' some patterned paper onto some copier paper.  You could use magazines for this part.


When the covers were dry I gave them a coat of Cobalt Teal Hue and, when dry, stamped the smallest stamp from the PaperArtsy Eclectica Set (ELB16) in stazon.  A few splashes of White acrylic added a bit more interest.

Back to the patterned paper...I stamped and embossed the large flower head and stalk using some lovely white glittery powder and cut out.  These were stuck to the book cover.


I added beads and ribbon before putting the book back together.


So does this qualify as collage or mixed media or both? haha!

From The Craft Barn I used:

A6 Book
PaperArtsy Eclectica ELB16
Beads
Ribbon
DecoArt Cobalt Teal Hue

Thank you for popping by, its lovely to 'see' you, take care xxx

Wednesday, 30 November 2016

Gift Book

I have decorated an A5 book for my project this time.  I like to keep a note of the presents I give at Christmas each year so that people don't get the same thing each time!!!  I can also keep an eye on my spending that way too :D
 
 
I covered the book with 2 layers of white gesso before adding some white modelling paste through the pretty STEAMPUNK CHRISTMAS TREE STENCIL.  I also added a little texture paste through some punchinella here and there.  While this was drying I took 3 snowflakes out of the MINI SNOWFLAKES PACK and painted them in pale blue before covering them with stickles.
 
 
A small bookplate was painted with primary Magenta, covered with Crackle Glaze then had Titanium antiquing Cream rubbed into it when dry.
 
When the book cover was dry and set I painted over the whole piece with Titanium White and added some little stamped snowflakes in Archival Plum, using the 2nd stamping.  The stencil was replaced and Primary Magenta was stencilled onto the tree.  Some pale blue was dry brushed in places.
 
 
I stamped the word 'Gifts' onto some white card and glued it to the bookplate before glueing it to the base of the tree.  The snowflakes were glued in place and some more stickle dots were added here and there for extra sparkle.  Some fancy lace finished the book off.
 
Thank you for popping by, take care XXX
 

Monday, 8 August 2016

Miniature Book

Hello, its recipe time over at Tando and this month its...
 
1 SQUARE, 2 STAMPS and 3 BUTTONS
 
I have made a little 2inch square book for my project...
 
 
The inside of the book has been made out of an 8x8inch piece of white card using the 'maze' method. The pink covers have been stamped with Stampendous' Mish Mash Stamps.  I stamped a face onto some cream card and overlaid the smallest scalloped frame, which was painted lilac. 
 
 
I used some hessian for the spine and threaded on the 3 buttons for decoration.
 
Thank you for coming to take a look, Take care xxx


Monday, 22 February 2016

Ticket Holder and L for locket!

Helloooo!!!!  Whenever hubby and I go up to London we use the train.  This means digging around in my bag for my Oyster card!!!  Whatever did we do before they invented those I wonder!!!!!!!  They save so much hassle don't they?  Anyway...I have made a holder for it and my tickets so that I can find them easily in my bag...


and the inside...


No...we don't always travel 1st class...that was a one off bargain hahaha!!!!!

The base is made out of GrungePaper.  This is wonderful stuff for this kind of project as when its painted it behaves a bit like leather!!!  I cut out the shape I wanted then painted it with purple acrylic.  Using a Tando Stencil (*here*) I added turquoise and green spots.  I then doodled round the spots with a white pen to make them stand out.  I also added a layer of satin varnish to both sides to make it waterproof...


The *buttons* were painted to match, one sewn onto the front and the other threaded with some trimming.  The trimming was placed onto the inside of the back to correspond to the front.  I folded up the flaps and stitched all round the edges to make the pockets.


Now it sits in my bag permanently and patiently waiting for my next trip to London!!!!!!

There is another letter up for the Craft Barn Alpha Challenge - L

I have added a Locket to my printers tray :p  Next time I will show you how my tray is filling up nicely!


Thank you for popping by!  Please leave a comment if you have the time, Hugs xxx


Monday, 21 September 2015

Another Book!

Hello!  I do love a good book haha!  Making them as well as reading them!  Tando sell a wide variety of these for you to decorate/alter.  There are 2 different sized kits from Neil Walker, which include a front, back and a spine as well as extra pieces for the front!  We also have Word Books where you can choose any word you would like up to 7 letters.  There are our own RING BINDERS, complete with board pages, as well as a selection of MINI BOOKS in different designs ( the Christmas one is a favourite!)  Yes...lots to choose from!!!!
 
I have chosen to use one of Neil's designs - a 6x6 kit called RANDOM 3.
 
 
The bases have been gesso'd then sprayed with Media Misters (Orange, Primary Yellow, Primary Cyan & Primary Magenta) to create a really bright background.  The layered piece has been painted with Media Fluids (Primary Magenta).  Isn't there a lovely sheen??? And so vibrant!!!!
 
 
Instead of using the spine provided I have bound mine with a Bind-It-All using black rings to match the black car I used for the pages.  YES, I used some black card!!!!  For the letters I sprayed some thin card the same as the backgrounds and stamped & embossed the letters before cutting out and applying.


If you like books and fancy giving one a makeover or making one from scratch then please join in with us.  You will find a link at the top of the Tando blog page for more info about how to win a prize!
 
Thank you so much for looking, Take care xxx


Tuesday, 1 September 2015

Solitude!

Hello there!  For anyone who loves girly colours then this months colour choice from Tando is definitely for you!  A rich mix of pinks and mauves :-D  I have done another page in my 8x8 RING BINDER.  The pages are thick enough to take the additions of paste and more chipboard.  Sorry that the tree looks red-ish...it really isn't!!!!! The tree is definitely the same colour as the dark mauve...I guess its my simple-as-anything camera :-D


The colour scheme:

I covered the bottom section with layers of lace and added some texture paint through a stencil for the top section before painting with acrylics.  The tree has had texture paint dabbed on to give it more definition.  I used DecoArt Media paint on it and I love that this paint has a slight sheen!

 
For the upper background I used the INK SPLATTERS MASK
 
 
The pretty FIR TREE comes in a pack of 2
 
The sturdy RING BINDER - great if you like chunky journaling:
 
 
Thank you for taking a look today.  If you fancy playing along with us with any of our prompts then take a click on the tab at the top of the blog.  We run a random draw once a month so you could win some Tando goodies!!!!
 
Take care,lots of hugs xxxxxxx

Monday, 20 July 2015

Decorated Ring Folder

Hello, I have gone all pink and girly for you today...so if you don't like pink look away now haha!!!  Have you spotted that Tando Creative sell RING BINDERS for you to alter????  They come in different sizes, are very sturdy and come complete with 6 fantastic board pages for you to create on!  I have decorated an 8x8inch folder for you...its very pink....
 
 
I have used DecoArt Media Misters throughout this project, I love that these are so vibrant, as you can see.  For the covers I sprayed through 3 different masks/stencils till I was happy.  I spread Crackle Texture through a flourish mask onto the HEARTS.  When they were dry I sprayed them with the mists.  The flourish was sprayed and treated to a coat of CLEAR CRACKLE GLAZE before cutting it up to make 'leaves'.  The stems are also chipboard, cut from a media board.


I shall be making up the boards from inside the folder using the prompts that Tando have lined up so look out for those :-D
 
I used:
8x8 Folder
 
 
Masks/stencils:
Giovanna Zara- Large Doillie
Andy Skinner - Sunburst
Tando - Random Circles
DecoArts Misters - Primary Magenta, Yellow Green & Purple
 
There is still time to enter our monthly challenge!  Just take a look at the July page at the top of our Blog for more details.
 
Thank you for indulging my pink 'phase' hahahaha!!!!! Take care xxx